Learn how to build a Multiple File Uploader with Next.js App Router, with a practical step-by-step approach by building a fully working Next.js file uploader.
Introduction
To make it easy for you to follow along, and be able to migrate the skills you learn here to your project and your use case, we will build a basic multiple file uploader from start to finish.
Requirements
In order to follow along with this tutorial, you need to be familiar with the basic of Next.js app router.
Also, you need to be familiar with creating Next.js project and it's default file structure.
What we will build?
We will create a new page /uploader, with a simple form to upload images to the server, all using the Next.js app router.
While in our example, we will upload image files, the same can be applied when uploading other files, with a small difference when previewing/validating the uploaded files.
When dealing with files in Node.js environment, we have a Blob object that we can send to our server regardless of its type.
What we will use for Styling?
I know we're building a file uploader and you may not be interested in how it will look as long as it works.
But, I think some of you may appreciate a styled example for learning rather than a basic unstyled form, also we're going to have a preview feature before and after the image is uploaded.
For that we will use Tailwind CSS which is installed by default with a new Next.js project.
Figma design
Using Figma I was able to design a simple design that we can use with our example project, It's always a good idea to have a design to use as reference when coding.
Our FileUploader component will have 3 states, a state when we first visit the uploader page, another when we select our image files, and final state when the files are uploaded.
The following are the Figma designs for the 3 states mentioned previously:
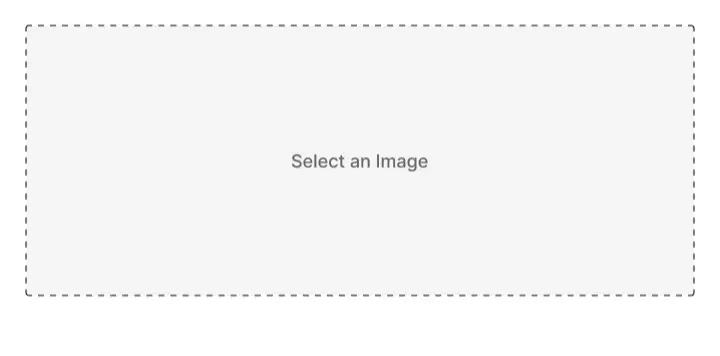
Initial state
The initial state is before we choose any file, and it will look something like the following design:
Preview state
The preview state is after we choose a file (image, can be multiple images), and it will look something like the following design:

Uploaded state
The uploaded state is after we choose a file, click on the Upload button and it will look something like the following design:

As you see it's similar to the preview state design, except that we only have the Replace button.
Project setup
Please feel free to bypass this section if you already have a Next.js project up and running.
Now that we have an idea about what we are going to build, let's start by creating a new Next.js project with app router.
Open your terminal, navigate to your workspace where you want to create your project, then run npx create-next-app@latest to create a new Next.js project.
The create-next-app command will ask you some questions related to the project configuration, go ahead and give the project a name, the accept all the default choices.
Clean up default styles and content
The default Next.js project comes with a homepage and some styling, the first thing I always like to do is to clean that up and start fresh.
Replace the homepage content with the following:
import Link from "next/link";

export default function Home() {
  return (
    <div>
      <h1 className="text-2xl font-bold">
        Codersteps project for Building a Multi File Uploader from scratch with Next.js app directory
      </h1>
      <div>
        <Link
          className="text-sm font-medium text-blue-500 hover:underline"
          href="/uploader"
        >
          Go to the Uploader page
        </Link>
      </div>
    </div>
  );
}
Here we're just adding a simple landing page with a title and a link to our uploader page which we will create later.
Now lets cleanup our Tailwind CSS setup by replacing the content for app/globals.css, and tailwind.config.ts with the following:
@tailwind base;
@tailwind components;
@tailwind utilities;import type { Config } from "tailwindcss";
const config: Config = {
content: [
"./pages/**/*.{js,ts,jsx,tsx,mdx}",
"./components/**/*.{js,ts,jsx,tsx,mdx}",
"./app/**/*.{js,ts,jsx,tsx,mdx}",
],
theme: {},
plugins: [],
};
export default config;To make our project look good, lets center the content globally using flex-box, to do that replace or adjust the content for the app/layout.tsx file with the following:
import type { Metadata } from "next";
import "./globals.css";

export const metadata: Metadata = {
  title:
    "Codersteps project for Building a Multi File Uploader from scratch with Next.js app directory",
  description:
    "Codersteps project for Building a Multi File Uploader from scratch with Next.js app directory",
};

export default function RootLayout({
  children,
}: Readonly<{
  children: React.ReactNode;
}>) {
  return (
    <html lang="en">
      <body className="h-screen">
        <main className="h-full flex items-center justify-center">
          <div className="w-full max-w-xl space-y-5">{children}</div>
        </main>
      </body>
    </html>
  );
}
You may notice that we removed the default Inter Google Font, so our project will use the default system font, but feel free to keep it.
Creating the /uploader page
Like we mentioned before we will have a dedicated page for our image uploader, while we are in the setup phase let's go ahead and create a brand new file at app/uploader/page.tsx.
import { FileUploader } from "@/components";

export default function Page() {
  return (
    <div className="space-y-3">
      <h1 className="text-xl font-bold">File Uploader Form</h1>
      <FileUploader apiUrl="/api/upload" />
    </div>
  );
}
The new page will be responsible for rendering the FileUploader component that we will build late in this tutorial.
For now, we can create the FileUploader component file at components/FileUploader.tsx with a basic setup like the following:
"use client";

export function FileUploader({ apiUrl }: { apiUrl: string }) {
    return <div>FileUploader placeholder: {apiUrl}</div>;
}
The "use client"; here is needed because we will use client side code later, as well as hooks to manage states which also requires the component to be a client-side component.
You may have noticed that we are able to import our component like import { FileUploader } from "@/components"; without specifying the component file name.
For that to work, we need to export the FileUploader component without the default keyword, as well as having and index.ts in the components directory.
Let's do that by creating that file, and use it to export all named exports from our FileUploader component:
export * from "./FileUploader";Installing dependencies
Because, I have already built the project, I know what dependencies the project uses, I though it would be better to install all of them in the setup phase.
Installing all dependencies before hand will help us focus more on how the file uploader logic works instead of getting distracted each time a new dependency is introduced.
Mime
The mime npm package is helpful when dealing with files mime-type and extension.
We will use this package later to extract the extension of the uploaded files from their type when generating a unique filename for each uploaded file.
To install the mime package, need to run npm install mime date-fns then to install its types we need to run npm install -D @types/mime.
File uploader API route
In order for the FileUploader component to work, we will need an upload API on our project.
For that, before trying to work on its implementation lets first create our API route at app/api/upload/route.ts with the following content:
import mime from "mime";
import { join } from "path";
import { writeFile } from "fs/promises";

const UPLOAD_DIR = join(process.cwd(), "public/uploads");

export async function POST(request: Request) {
  const formData = await request.formData();
  const files = formData.getAll("files");
  const uploadFilePromises: Promise<string | false>[] = [];

  if (files.length === 0) {
    return Response.json({ uploadedFiles: [] });
  }

  for (const file of files) {
    if (!(file instanceof Blob)) {
      continue;
    }

    uploadFilePromises.push(uploadFile(file));
  }

  return Response.json({
    uploadedFiles: (await Promise.all(uploadFilePromises)).filter(
      (uploadedFile) => uploadedFile !== false
    ),
  });
}

async function uploadFile(file: Blob) {
  const buffer = Buffer.from(await file.arrayBuffer());
  const uniqueSuffix = `${Date.now()}-${Math.round(
    Math.random() * 1e9
  )}`;

  const filenameParts: string[] = [];
  if ("name" in file && typeof file.name === "string") {
    filenameParts.push(file.name.replace(/\.[^/.]+$/, ""));
  }
  filenameParts.push(
    `${uniqueSuffix}.${mime.getExtension(file.type)}`
  );

  try {
    const filename = filenameParts.join("-");
    await writeFile(`${UPLOAD_DIR}/${filename}`, buffer);
    return `/uploads/${filename}`;
  } catch (e) {
    console.error(
      `Error while trying to upload the file: ${filenameParts[0]}.\n`,
      e
    );

    return false;
  }
}
The uploaded files are not accessible on production
At the top we have defined the constant UPLOAD_DIR to store the location where to write the uploaded files.
Storing the uploaded files under the public/uploads directory will work fine on development as there's no cache involved.
But when we build (npm run build) our Next.js project, then start it (npm start), Next.js seem to remember the files under the public directory.
As a result any newly uploaded file will not be available until you restart the Next.js server (no need to rebuild).
As a solution we can use Nginx on production to serve our uploaded files outside the scope of our Next.js application.
To not make this article too long and complex, I explained how to solve this issue in this article: Building a Static Server for Next.js Uploaded Files.
Handling the API Post request
In Next.js app router the file app/api/upload/route.ts will generate an endpoint at /api/upload by default it doesn't handle any request.
To handle a request we need to export an async function with an HTTP verb/method as its name, in our case we will use the POST method to handle our file upload.
export async function POST(request: Request) {
  const formData = await request.formData();
  const files = formData.getAll("files");
  const uploadFilePromises: Promise<string | false>[] = [];

  if (files.length === 0) {
    return Response.json({ uploadedFiles: [] });
  }

  for (const file of files) {
    if (!(file instanceof Blob)) {
      continue;
    }

    uploadFilePromises.push(uploadFile(file));
  }

  return Response.json({
    uploadedFiles: (await Promise.all(uploadFilePromises)).filter(
      (uploadedFile) => uploadedFile !== false
    ),
  });
}
The POST function accept the request as an argument, we can use the standard Web API methods to get the request body.
Here we use the formData method to retrieve the request body, which includes our files.
After that, we do some simple validations that you can extend to match your requirements.
Once the validation is done, we loop through the uploaded files, make sure the file is of type Blob before trying to save it to our disk.
Once we confirm that the file is of type Blob its type to call the uploadFile function that will save our file on disk.
You may have noticed that we don't await the function call, instead we push it to the uploadFilePromises array.
This is to write multiple files to the disk at same time, which will result in faster result.
At the end, we await Promise.all giving it our list of promises returned from the uploadFile function to make sure we don't respond to the client before the promise is resolved.
As we see next, the uploadFile function may resolve to a string a url in case of success or false in case of failure.
And because we're returning a list of urls for the uploaded files, we're filtering out any failures.
The uploadFile function
The uploadFile function is responsible for saving a file of type Blob with a unique name under the provided UPLOAD_DIR.
This function expects that we manually created the uploads directory defined in the UPLOAD_DIR constant.
async function uploadFile(file: Blob): Promise<string | false> {
  const buffer = Buffer.from(await file.arrayBuffer());
  const uniqueSuffix = `${Date.now()}-${Math.round(
    Math.random() * 1e9
  )}`;

  const filenameParts: string[] = [];
  if ("name" in file && typeof file.name === "string") {
    filenameParts.push(file.name.replace(/\.[^/.]+$/, ""));
  }
  filenameParts.push(
    `${uniqueSuffix}.${mime.getExtension(file.type)}`
  );

  try {
    const filename = filenameParts.join("-");
    await writeFile(`${UPLOAD_DIR}/${filename}`, buffer);
    return `/uploads/${filename}`;
  } catch (e) {
    console.error(
      `Error while trying to upload the file: ${filenameParts[0]}.\n`,
      e
    );

    return false;
  }
}
To easily understand what's happening here, you can think of it in a 3 steps:
Convert Blob to Buffer
In Node.js to write a file to disk, we can use the fs/promises.writeFile function, which doesn't support a Blob as its data.
The fs/promises.writeFile function supports Buffer as its data, alongside some other formats.
To get a Buffer from Blob we the Buffer.from and give it the arrayBuffer that we retrieve from the Blob: Buffer.from(await file.arrayBuffer()).
Generate a unique filename
To avoid overriding files, we need to make a unique filename for each uploaded file.
To achieve that, we divid the filename into 3 parts: original filename, a unique suffix, and the file extension.
First, we generate a unique suffix combining the current timestamp, with a random string.
We can get the original filename using file.name even if TypeScript doesn't see that, because the Blob type doesn’t have a name attribute on it.
We know that our file have the name attribute, so to avoid any TypeScript we check first using "name" in file && typeof file.name === "string".
It maybe confusing but what's happening is that we have some types differences between Node.js and the Browser.
In the browser, we have the File type which extends the Blob type, and adds to it some extra attributes like name.
In Node.js we only have the Blob type, so we know that we sent a File from our client, which includes the name but Node.js doesn't show it.
Lastly, we use the mime package to extract the file extension from the file.type, then we join them together resulting in a unique filename.
Write the file to disk
After we generated a unique filename, and we converted our Blob to a Buffer, it's time to use them to write the file to disk.
As mentioned before, we will use the fs/promises.writeFile function giving it the absolute path where to store the file, and the buffer as the file data.
If the writeFile function doesn’t throw an exception it means its a success, and we can return the relative path.
In case it throws an error it means it was a failure, and we can return a false. the failure maybe related the uploads directory doesn't exists, but you can check the console to verify.
FileUploader component implementation
Now that we have our API working and ready, we can now work on our FileUploader component.
In the setup phase we created the FileUploader component, but we didn't implement anything related to choosing, previewing or uploading files.
To make it easy for you to understand, we will go step by step, as described in the Figma design section.
Ability to select images
"use client";

import { ChangeEvent, useState } from "react";

export function FileUploader({ apiUrl }: { apiUrl: string }) {
  const [selectedFiles, setSelectedFiles] = useState<File[]>([]);

  async function onChange(e: ChangeEvent<HTMLInputElement>) {
    const { files } = e.target;

    if (!files || files.length === 0) {
      console.warn("files list is empty");
      return;
    }

    setSelectedFiles(Array.from(files));
  }

  if (selectedFiles.length === 0) {
    return (
      <label className="border border-dashed border-[#666666] hover:border-black rounded bg-gray-100 hover:bg-gray-200 text-[#666666] hover:text-black transition-colors duration-300 h-48 flex items-center justify-center">
        <span className="text-sm font-medium">Select an Image</span>
        <input
          className="h-0 w-0"
          type="file"
          accept="image/*"
          multiple
          onChange={onChange}
        />
      </label>
    );
  }

  return <div>FileUploader placeholder: {apiUrl}</div>;
}
First, we define the state selectedFiles to keep track of the selected files, then we simple add a label with an input for type file.
We set the attribute accept="image/*" to only allow images, but you can extend or change it depending on your use-case.
We also added the multiple attribute to allow selecting multiple images, as our API supports uploading multiple files.
Then we define the onChange function and attach it to the input onChange event, so its called every time the input changes.
The onChange handler, will extract the chosen files, and assign them to the selectedFiles state.
This will result in hiding the initial state of the component, for now it will fallback to the previous <div>FileUploader placeholder: {apiUrl}</div>;.
Preview the selected images
Once we have some selected files, the initial state will be hidden, and the preview state will be shown instead.
"use client";

import Image from "next/image";
import { ChangeEvent, useState } from "react";

export function FileUploader({ apiUrl }: { apiUrl: string }) {
  const [selectedFiles, setSelectedFiles] = useState<File[]>([]);

  async function onChange(e: ChangeEvent<HTMLInputElement>) {
    const { files } = e.target;

    if (!files || files.length === 0) {
      console.warn("files list is empty");
      return;
    }

    setSelectedFiles(Array.from(files));
  }

  function onClear() {
    setSelectedFiles([]);
  }

  if (selectedFiles.length === 0) {
    return (
      <label className="border border-dashed border-[#666666] hover:border-black rounded bg-gray-100 hover:bg-gray-200 text-[#666666] hover:text-black transition-colors duration-300 h-48 flex items-center justify-center">
        <span className="text-sm font-medium">Select an Image</span>
        <input
          className="h-0 w-0"
          type="file"
          accept="image/*"
          multiple
          onChange={onChange}
        />
      </label>
    );
  }

  if (selectedFiles.length > 0) {
    return (
      <div className="border border-dashed border-gray-700 hover:border-black rounded">
        <div className="grid grid-cols-2 gap-3 p-3">
          {selectedFiles.map((selectedFile, idx) => (
            <div key={idx}>
              <Image
                src={URL.createObjectURL(selectedFile)}
                alt={selectedFile.name}
                width={500}
                height={500}
                quality={100}
                className="object-cover w-full h-auto"
              />
            </div>
          ))}
        </div>
        <div className="flex items-center justify-end gap-x-3 border-t border-dashed p-3 border-gray-700">
          <button
            type="button"
            onClick={onClear}
            className="bg-zinc-300 hover:bg-zinc-200 transition-colors duration-300 px-3 h-10 rounded"
          >
            Clear
          </button>
        </div>
      </div>
    );
  }
}
When we have some selected files selectedFiles.length > 0 we preview them, and add a new CTA to clear the selectedFiles.
The selectedFiles state is a list of files, which cannot be passed directly to the Image component, so we need to convert each file to a url using URL.createObjectURL.
Now that we preview all the selected images. Just after images grid we add a new button to clear the selected images.
To clear the selected images, we defined a new handler onClear and attached it to the Clear button onClick event.
The onClear handler simply set the selected images to and empty array, which will result in going back to the initial state where we can select new files.
Upload the selected images
Now that we are able to select and preview images, it's time to add the Upload functionality and finalize our component.
"use client";

import Image from "next/image";
import { ChangeEvent, useState } from "react";

export function FileUploader({ apiUrl }: { apiUrl: string }) {
  const [selectedFiles, setSelectedFiles] = useState<File[]>([]);
  const [uploadedFiles, setUploadedFiles] = useState<string[]>([]);

  async function uploadSelectedFiles() {
    if (apiUrl.trim().length === 0) {
      console.warn("Please provide a valid apiUrl.");
      return [];
    }

    if (selectedFiles.length === 0) {
      return [];
    }

    const formData = new FormData();

    for (const file of selectedFiles) {
      formData.append("files", file);
    }

    try {
      const res = await fetch(apiUrl, {
        method: "POST",
        body: formData,
      });

      if (!res.ok) {
        console.error("something went wrong, check your console.");
        return [];
      }

      const data: { uploadedFiles: string[] } = await res.json();
      return data.uploadedFiles;
    } catch (error) {
      console.error(
        "something went wrong, check your server/client console."
      );
    }

    return [];
  }

  async function onChange(e: ChangeEvent<HTMLInputElement>) {
    const { files } = e.target;

    if (!files || files.length === 0) {
      console.warn("files list is empty");
      return;
    }

    setSelectedFiles(Array.from(files));
  }

  async function onUpload() {
    setUploadedFiles(await uploadSelectedFiles());
    console.log("All files were uploaded successfully.");

    setSelectedFiles([]);
  }

  function onClear() {
    setSelectedFiles([]);
    setUploadedFiles([]);
  }

  if (selectedFiles.length === 0 && uploadedFiles.length === 0) {
    return (
      <label className="border border-dashed border-[#666666] hover:border-black rounded bg-gray-100 hover:bg-gray-200 text-[#666666] hover:text-black transition-colors duration-300 h-48 flex items-center justify-center">
        <span className="text-sm font-medium">Select an Image</span>
        <input
          className="h-0 w-0"
          type="file"
          accept="image/*"
          multiple
          onChange={onChange}
        />
      </label>
    );
  }

  if (selectedFiles.length > 0 || uploadedFiles.length > 0) {
    return (
      <div className="border border-dashed border-gray-700 hover:border-black rounded">
        <div className="grid grid-cols-2 gap-3 p-3">
          {selectedFiles.map((selectedFile, idx) => (
            <div key={idx}>
              <Image
                src={URL.createObjectURL(selectedFile)}
                alt={selectedFile.name}
                width={500}
                height={500}
                quality={100}
                className="object-cover w-full h-auto"
              />
            </div>
          ))}

          {uploadedFiles.map((uploadedFile, idx) => (
            <div key={idx}>
              <Image
                src={uploadedFile}
                alt="An uploaded file"
                width={500}
                height={500}
                quality={100}
                className="object-cover w-full h-auto"
              />
            </div>
          ))}
        </div>
        <div className="flex items-center justify-end gap-x-3 border-t border-dashed p-3 border-gray-700">
          <button
            type="button"
            onClick={onClear}
            className="bg-zinc-300 hover:bg-zinc-200 transition-colors duration-300 px-3 h-10 rounded"
          >
            Clear
          </button>
          {uploadedFiles.length === 0 && (
            <button
              type="button"
              onClick={onUpload}
              className="bg-sky-500 hover:bg-sky-600 transition-colors duration-300 text-white px-3 h-10 rounded"
            >
              Upload
            </button>
          )}
        </div>
      </div>
    );
  }

  return null;
}
Before explaining what we've added, if you try to upload the selected files, and you didn't create the /public/uploads directory you will face the following error:
Error coming from our upload API: Error: ENOENT: no such file or directory ..., to solve that just go ahead and create the uploads directory and try again.
Now that all is working as expected let's understand what we've added, we'll break it up into two steps as follow:
The uploadedFiles state
Same to what we did for the preview, we need a new state to keep track of the uploaded files urls returned by the upload API.
For that, we created a new state uploadedFiles, and used it to extend the conditions for the component to be aware we're on the uploaded state.
Setup the Upload button
Next to our Clear button we added a new button upload, and attached to its onClick event the function on onUpload.
Next, we created a new function uploadSelectedFiles which is responsible for uploading the selected files using our API, and return the uploaded files.
The onUpload handler uses the uploadSelectedFiles function to uploaded the files and update the uploadedFiles state, the clear the selected files to preview the uploaded files instead of selected ones.
The uploadSelectedFiles function
The uploadSelectedFiles function will simply use the selected files from the selectedFiles state, and the apiUrl passed as a property.
First it does some validation that can be changed to meet your needs, then create a FormData object and attach the files to it.
Its important to keep in mind that the provided key to the formData files need to match what we used in the API:
formData.append("files", file); and formData.getAll("files"); both uses the same key files.
Cloning the project
Source code is available at: https://github.com/codersteps/nextjs_app_dir_multi_file_uploader.
You can clone it with: git clone https://github.com/codersteps/nextjs_app_dir_multi_file_uploader.git
Conclusion
In this article we have learned how to build a files uploader using Next.js app router.
We started by setting up our project, creating an API, and finally we built a component that uses the API to upload the selected files.
In our example we used files of type image, but same principles apply to all other files types.
If you have a question about this article, please use the form at bottom to submit your question.